Picked up an OG JBJ12 with a bad ballast and stand for $50 on Craigslist.
Purchased Equipment:
24VDC 150w 6.5a power supply - LED Supply - $30
2 x 1000ma wired BuckPuck w/ external dimmer - LED Supply - $20/ea
2 x Aluminum Potentiometer Turn Knob - LED Supply - $2.50/ea
Arctic Alumina Premium Thermal Adhesive - RapidLED - $7
6 x CREE XR-E Q5 Cool White 3W LED on Star - RapidLED - $5.75/ea
6 x CREE XR-E Royal Blue 3W LED on Star - RapidLED - $5.75/ea
12 x Solderless Connector for CREE XP-E LEDs - RapidLED - $1.50/ea
Drilled and Tapped 4.25" x 9" Heat Sink for 12 LEDs - RapidLED - $22
2 switches - Radio Shack - $3/ea
7' .5" split loom - HomeDepot - $3
Previously Owned Equipment:
12" Blue CCFL
12" UV CCFL
Project box
Wire, splices, shrink wrap, etc
First, I gutted the hood and mounted the heat sink. I used some regular automotive polish and an orbital buffer to polish up the heat sink. I did not grind down any of the original mounting posts and drilled 2 holes in the heat sink to utilize existing posts for mounting.

Fast forward a few hours. All the LEDs are mounted to the heat sink with thermal adhesive and solderless connectors are screwed in. I also mounted a red LED but have not wired it up...not sure if I will use it or not. I used a Dremel with fiberglass cut-off wheel to remove the back center of the the clear plastic shield to allow better airflow to the heat sink. I then wired up all the bits to a 12pin connector and superglued it to a space cut out of the lid. This is where I made mistakes 1 & 2. You can see I mounted the blue CCFL on the front and the UV inside the shield. It was late and I was tired and wasn't paying proper attention. The other thing I came to realize is that you cannot extend the white wires on CCFL lights with ordinary wire. My original plan was to have the converters in the project box, but this had to change.


I ended up moving the converters from the project box to inside the shield. I cut a CD case to fit the space so they would have a flat surface and not totally block airflow. I used hot glue to mount the case and the afix the converters. I moved both CCFLs to the front, mounting the UV closest to the water and the blue (to be used for moon lighting) above it.


Next I wired up the enormous project box, drilling holes for the wires and switches, a few for airflow, and a large hole to mount the fan. Inside are the BuckPucks and a Pot to control the hood fans' speed.
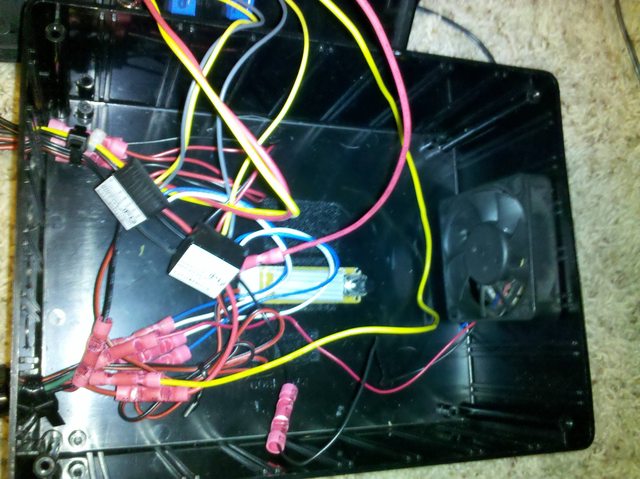

I took the old reflector, cut and bent a bit, to make a shield/air flow deflector. The screws holding in go through the fans and use the fan mount points.

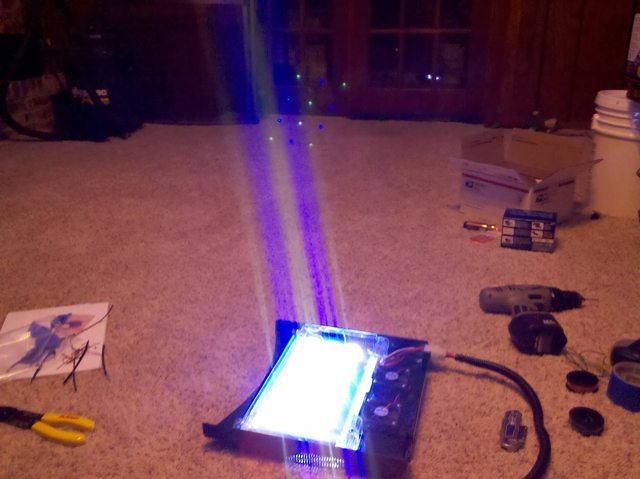
Digital cameras do funny things.

Things I'd change:
1. The blue CCFL is on a separate 6VDC wall wart, but when I hooked it up to a multimeter it's actually putting out about 9VDC. It's too bright and I will have to change it out for something smaller.
2. The fan in the project box is on the same circuit (in serial) and the UV CCFL. It's way too loud. Needs to be replaced or the circuits reworked to slow it down.
3. When goofing around last night, I noticed the lighting looks much more crisp when the lid is lifted off the tank about 3 inches. I think this gives the lighting more time to "mix" and I don't end up with blue/white ripples in the water. I will eventually build a custom hood with a bit more elevation.
Next project:
1. Arduino based lighting controller, temp monitor, etc.